|
Hello All! Hopefully I have some documenters and scrapbookers out there! When I was pregnant, I really wanted a unique baby album for my little bundle of joy. I looked at DIY after DIY, and came upon Project Life by Becky Higgins. I gotta tell you, this has changed my life! I never really got into the physical products, but I have used the app like it's going out of style. So, I decided I would put together a little beginners guide.  1. First, and foremost, get a secondary source of photo storage. I started out using Dropbox, but soon switched to Google Photos because Dropbox will charge a monthly fee after you store so much. Which is fine, it just didn't fit into our budget. There is also iCloud, iCloud Photo Library, and Air Drop, but I am a little unfamiliar with those. While you should always back up your photos regardless, this will also allow you to pull photos into your app from multiple devices. You will just be choosing Dropbox, Google Photos, etc. to pull them from instead of the Photo Gallery. 2. Speaking of secondary storage, if you would like to work on multiple devices, I would suggest saving your pages as Editable Back Ups. Since the Project Life app does not cross over between devices, anything you've been working on will only be editable on that device. Therefore, sharing it will help you work on it somewhere else and will be a lifesaver if anything should happen to your device and it no longer works. 3. So, what do you do if you have not saved editable back ups and you want to print your pages? (Like yours truly, ugh) Let me give you an example-When I got my new phone, I downloaded the app on that phone and basically had to start all over again because my previous pages were stuck on my old phone. This is where the collage option came in handy. I just saved my pages as 12 x 12 images (do this even if you are printing 8 x 8's for best resolution) and then dropped them into the 12 x 12 collage page. Then you can put them in whatever folder they need to go in and keep them there until you are ready to print. 4. Digital pages will not print front and back. So keep in mind that you will have two printed pages per album sleeve. 5. When doing a two page spread, keep an eye on the "Completed" category of the app. That will show you the most recent pages worked on, so if you pull up those two pages to edit, it will show them as the first and second pages you just completed, therefore, showing them side by side. This will help you to see what they will look like side by side. 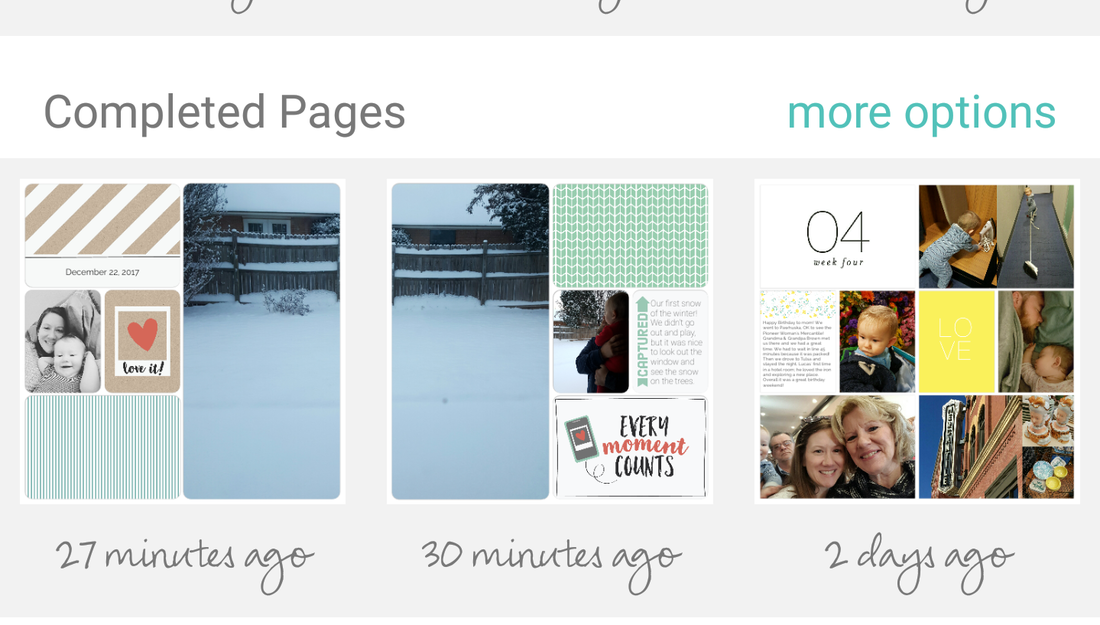 6. So a little while ago, the Android version updated with the option to make folders for you pages and then customize each page within the folder (this is awesome by the way!). I kept thinking, "How will I keep track of the pages I've printed?" Well, this is super simple - just click on the "Update Page Info" option and change the Page Name to "Printed". Easy, peasy!
7. Last, but not least, if you are using a layout that doesn't have a certain journal card or filler card for the spot you are trying to fill, just plug it into a collage option, if possible, and save as an image. Then you can use it on your page! If I have any more tips or ideas, I will definitely share them with you! Thanks for reading and scrapbook on! Peace, Anne
0 Comments
Leave a Reply. |

Hello!
I'm Anne! Follow me as I go through life as a new mom and soon-to-be wife. Always looking for a creative outlet, I want to share all my ideas with you here at Life by Design! 
Archives
February 2018
tags
All
|
 RSS Feed
