hello! I know, I know, what the heck am I talking about? Well, let me fill you in.... So, on the last big update for the PL app, they added a new feature called "Preferences". This addition allows you to change your default settings for layouts, collages, text, and drop shadows. What is a drop shadow, you ask? Well, in order to give your pages a more dimensional look, they have a small shadow around all the "pockets". This gives the pages a little more depth, making them appear more like a physical page. Now, with the option to turn the shadow off, you are left with a flat look, allowing you to take away the pocket look. This makes your pages look like a more traditional scrapbook page. Here's how you do it: 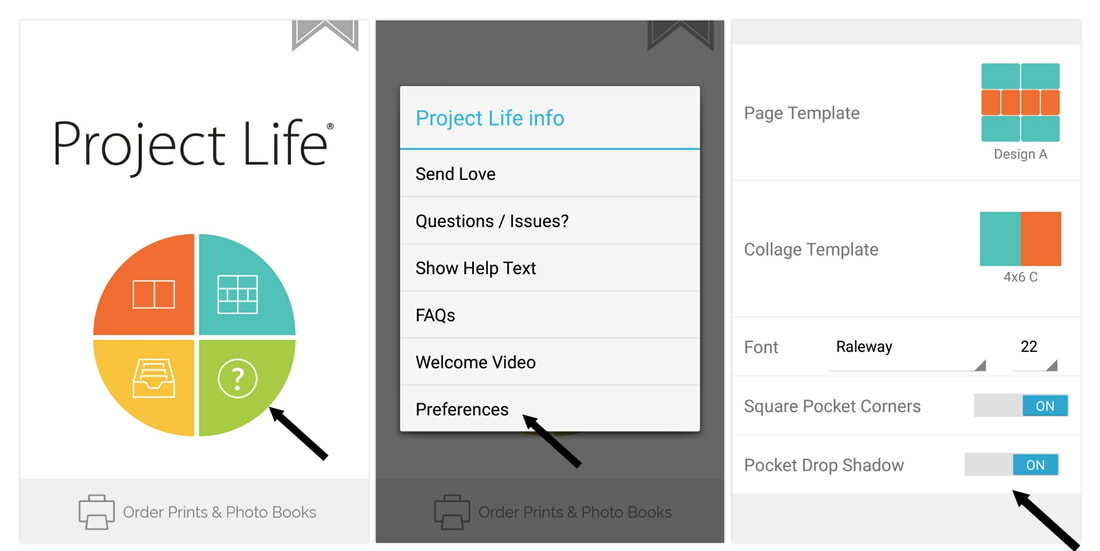 Ok, so where am I going with this? Lately, I have been venturing outside if the PL app world and playing around with a more digital scrapbook look. I can this in my PixelLab app. But, working on a phone can be tedious when putting together a layout. Thats where leaving the drop shadows behind can help! I can simply add my photos into whatever pockets I want, change the background color, and the other pockets to match and, voila!, I've got a template! Then, I just simply export into PixelLab and add my digital embellishments. While this probably won't be the main way I scrap, it is just another option that I like to have in my arsenal. See below for an example :) 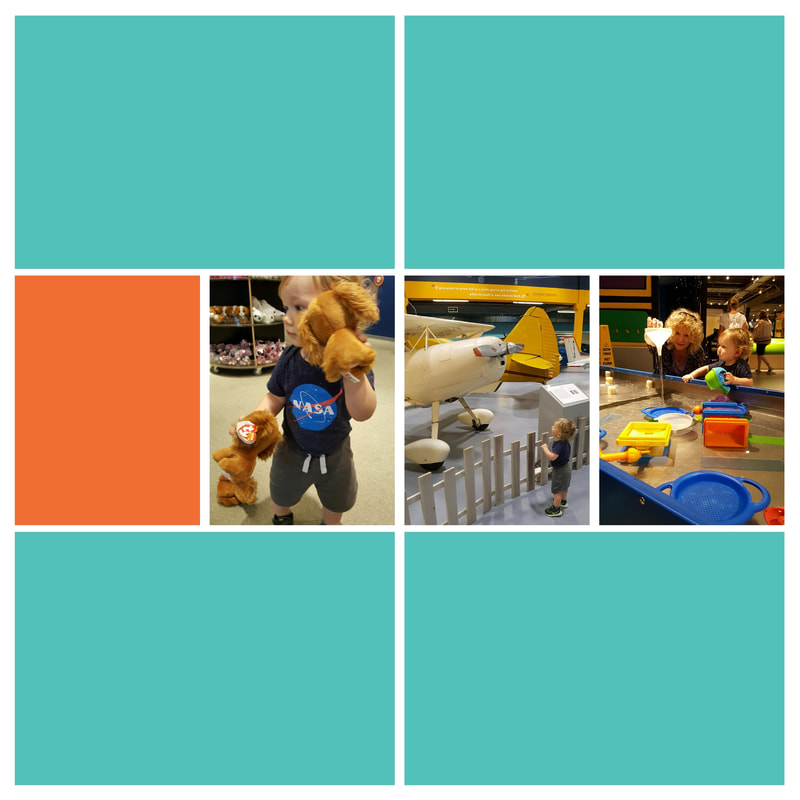 First, I open up the Design A template and add my pictures . 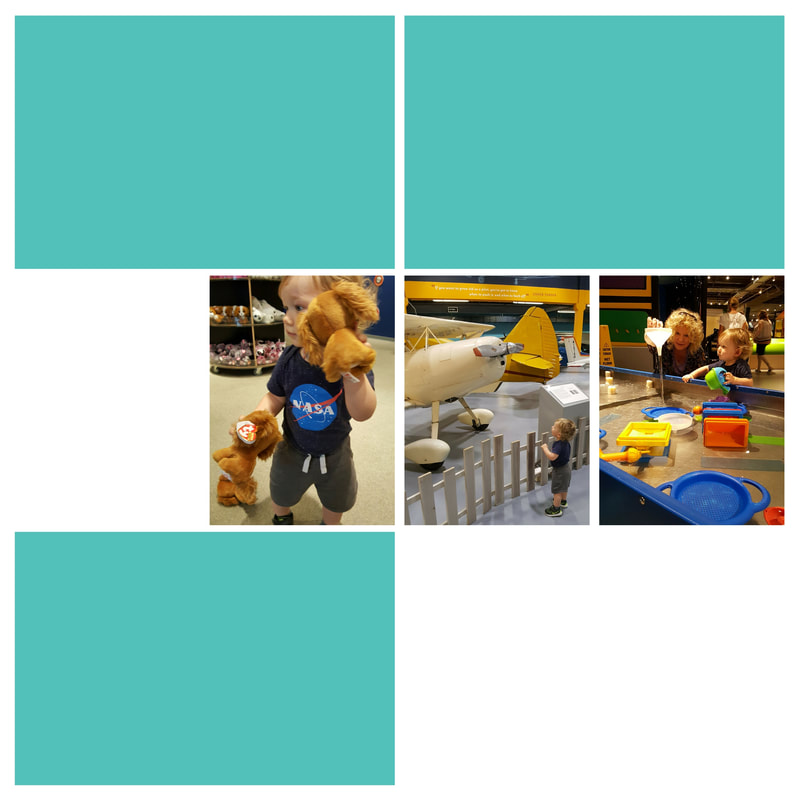 Then, I start adding the white cards from the Neutral Card Pack to match my white background. This will give me a clean, white negative space. If you want to change the color, just use whatever kit you want, pick a color, and then make sure you have solid cards to match the background options so they match and make a solid color. 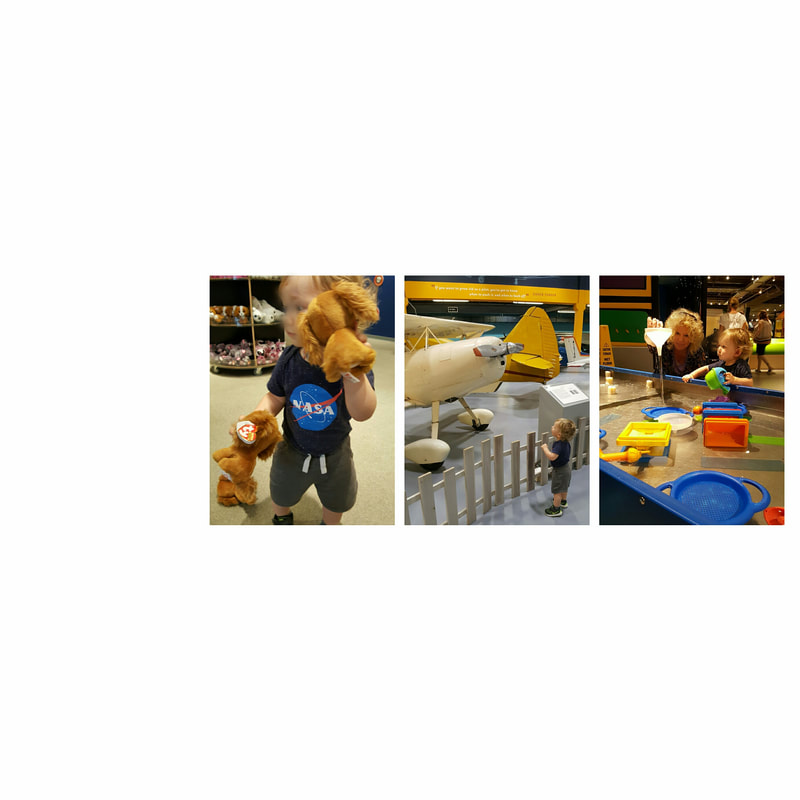 Last, you will end up with a page like this. Export directly into PixelLab (or app of your choice), or save to your gallery and upload within PixelLab.  And start adding embellishments!! Eek! I just love experimenting and trying these new methods of app scrapping! For this page, I used the "Anything You Can Imagine" kit, by Shawna Clingerman (love her!). I hope you get the chance to try this! If so, let me know in the comments below :)
Peace, Anne
0 Comments
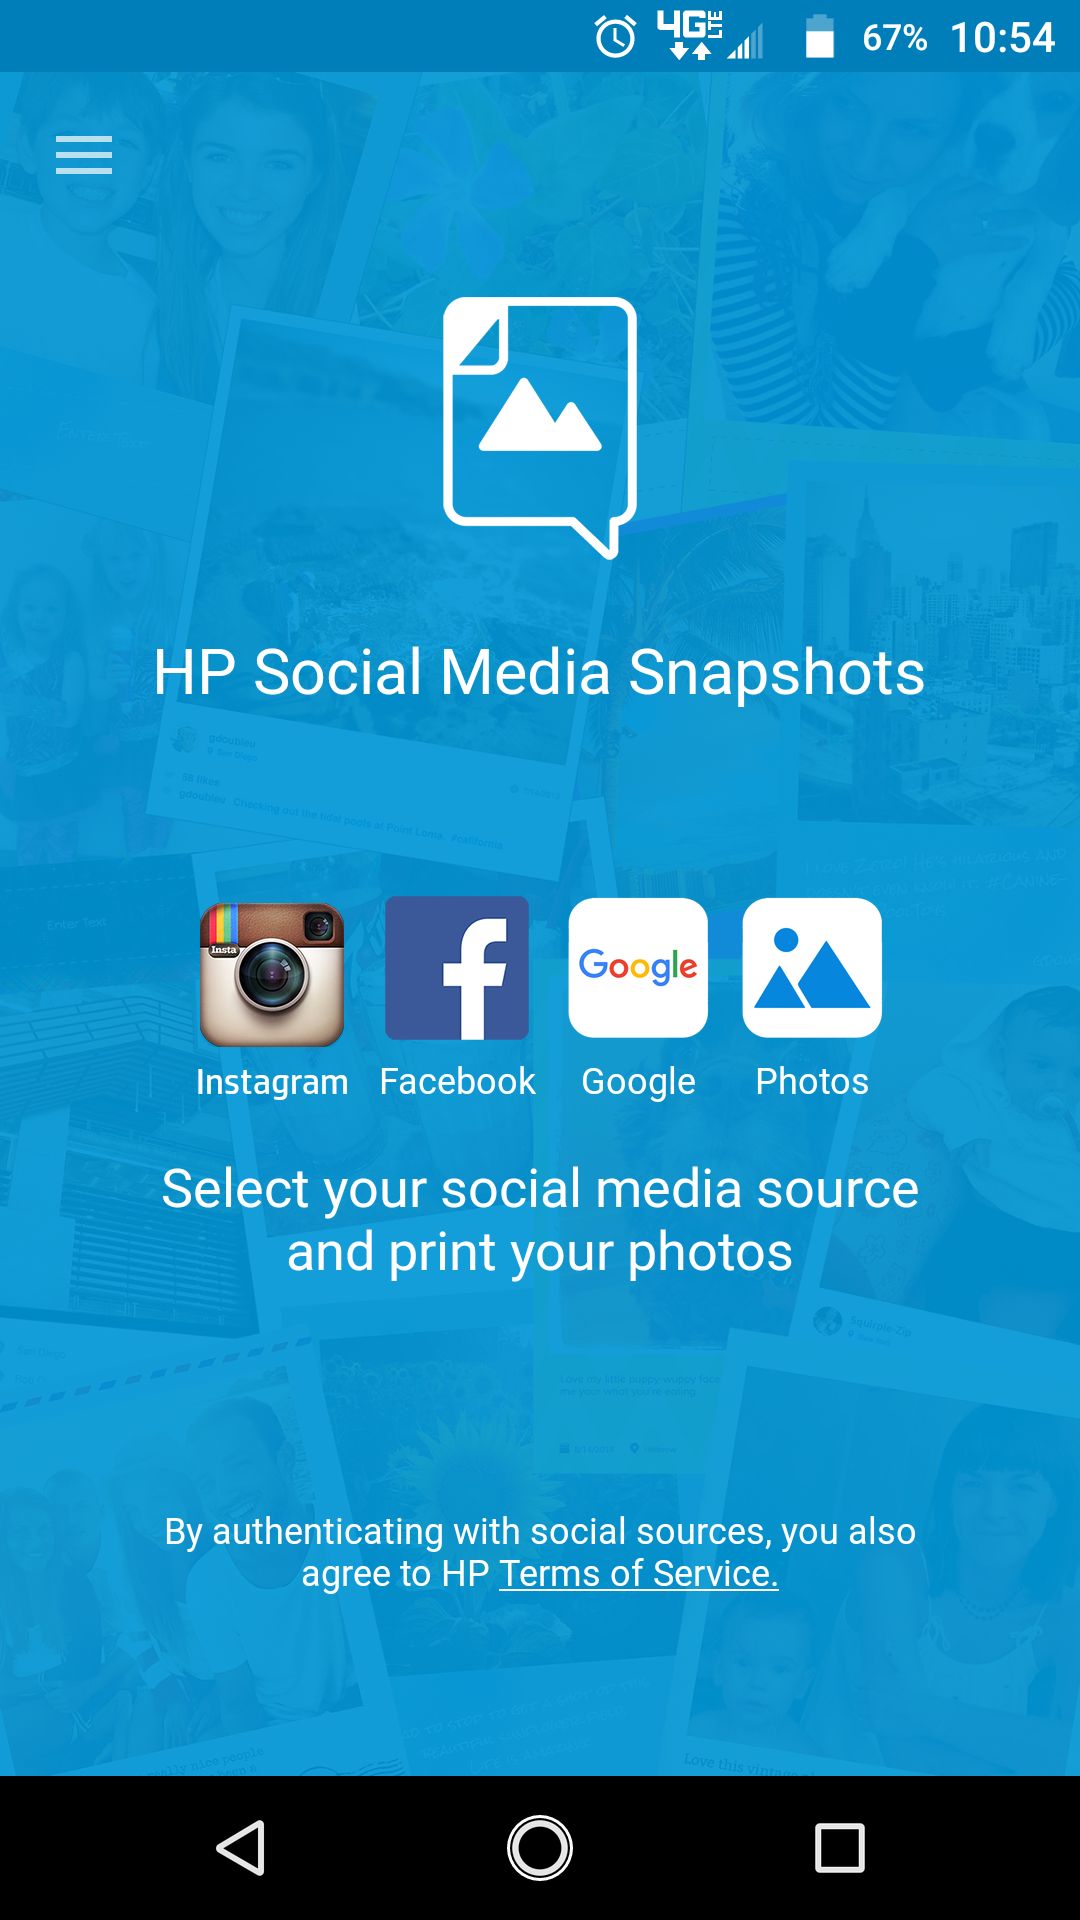
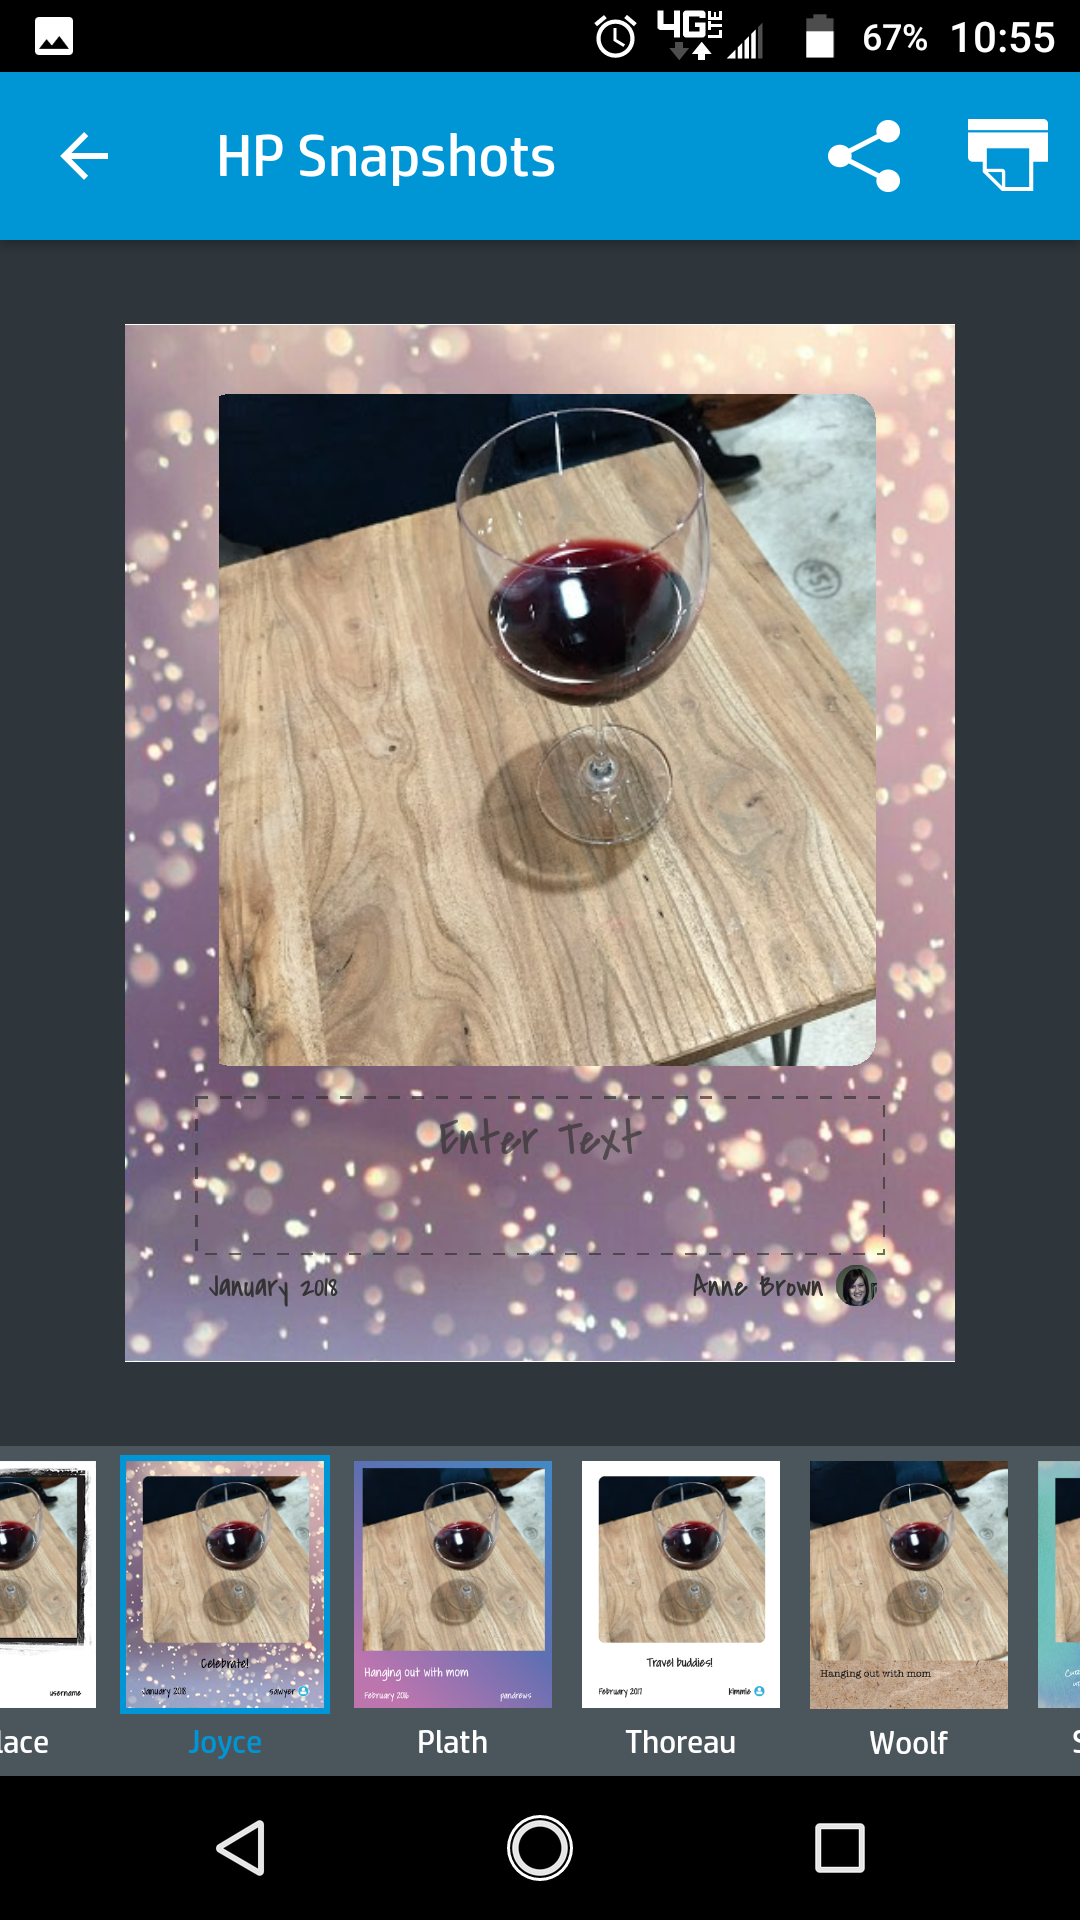
Hello, everyone! How is your January going?? So far, so good over here :) In the past I have talked about outside apps to use to enhance your Project Life projects. Two of my favorites are PixelLab and HP Snapshots. Now, being an Android user, sometimes we don't get the cool things that iPhone users get. So, I have to search for apps that give me the same concept as the iPhone apps and these two are exactly that. In my scrapbooking journey, I noticed some people had these really cool Polaroid style pictures in their layouts. 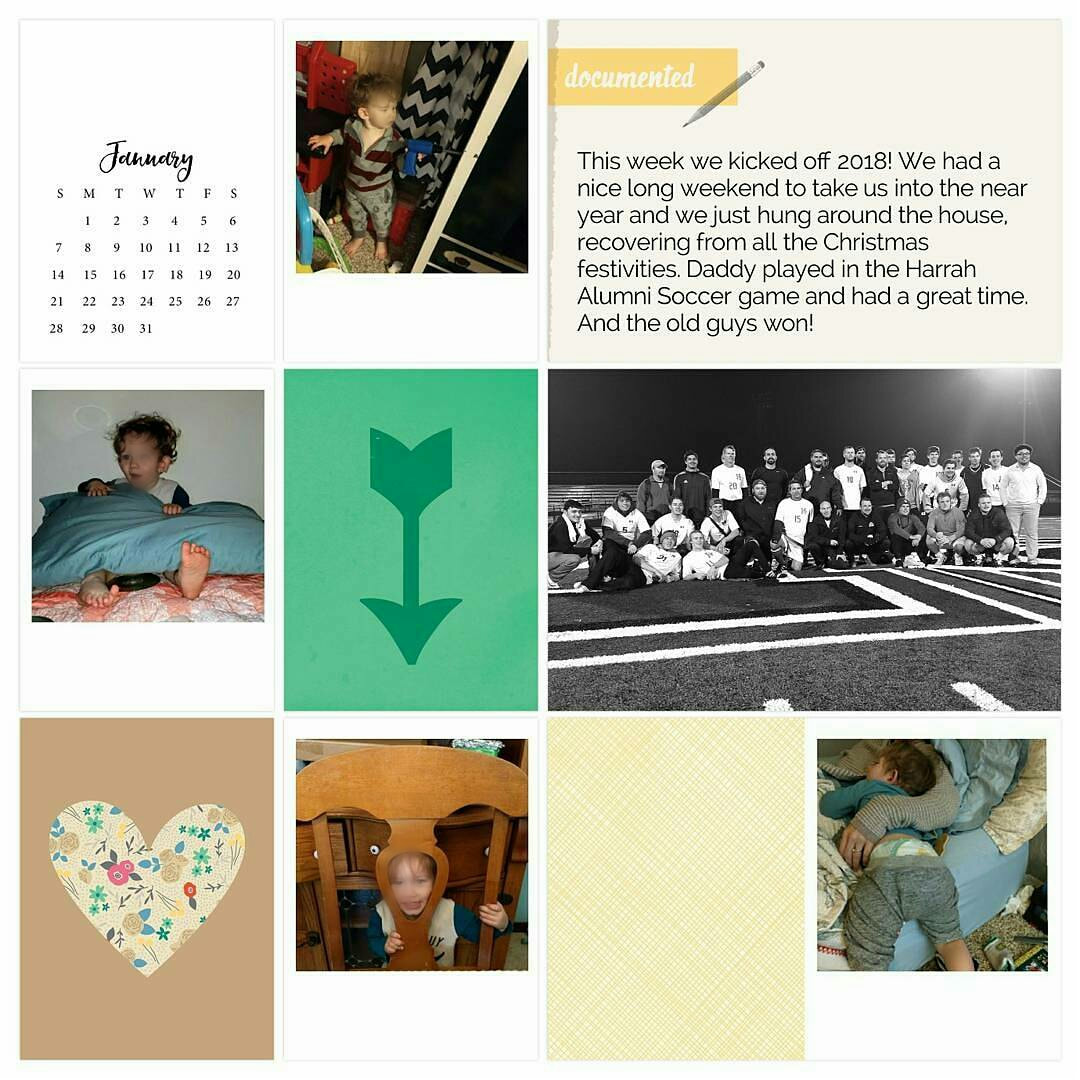 If you are an iPhone user, you may be familiar with the Collect app. It is a daily journaling app that places this polaroid style overlay on your picture. I loved the look and asked around, and the consensus for Android was HP Snapshots. Now, it does not allow much for journaling, but you can put some overlays on it with different effects and it does allow for some text, but it's very limited. So, my solution to this is to use my favorite overlay and then upload it to PixelLab for editing. Ok, let's get into the details :) First, you're going to open up HP Snapshots. You will see a screen that will allow you to pull your photo from whatever social media/gallery you want. I use Google Photos, so I get mine from there.
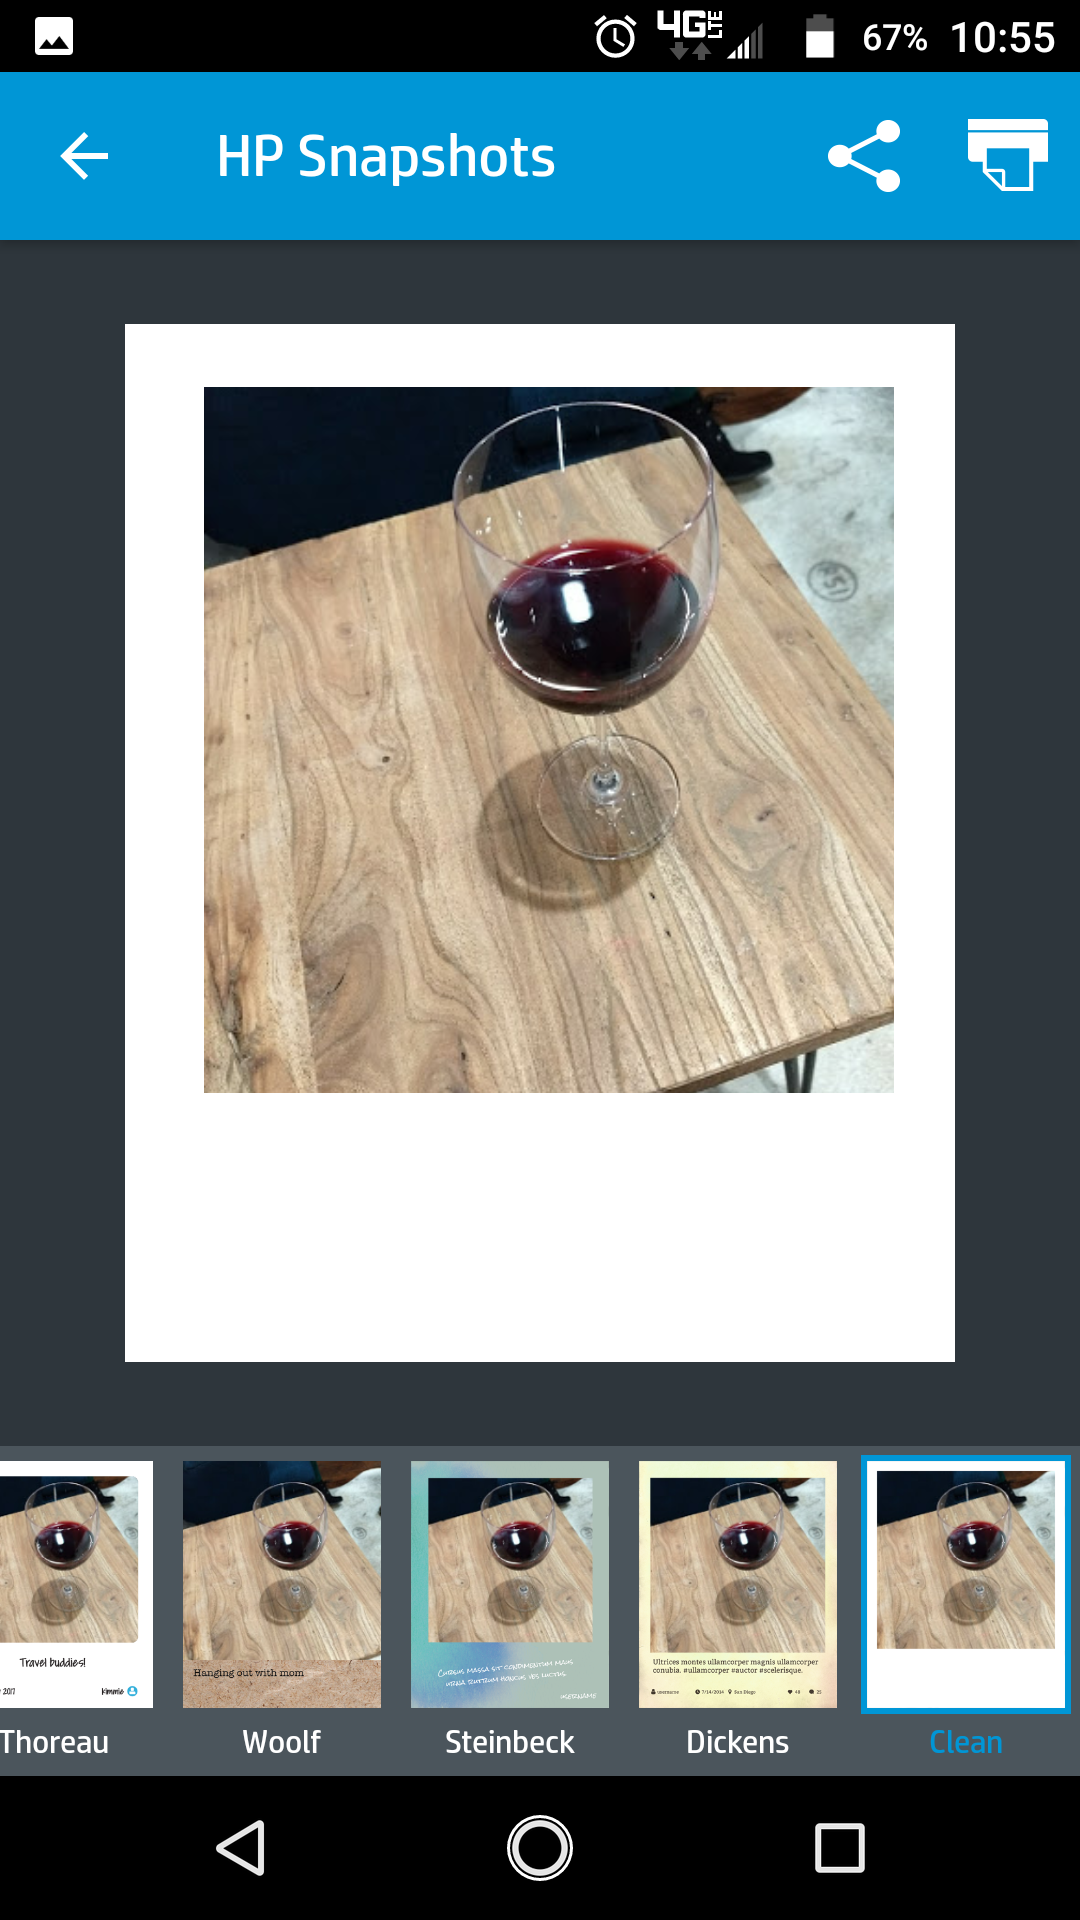
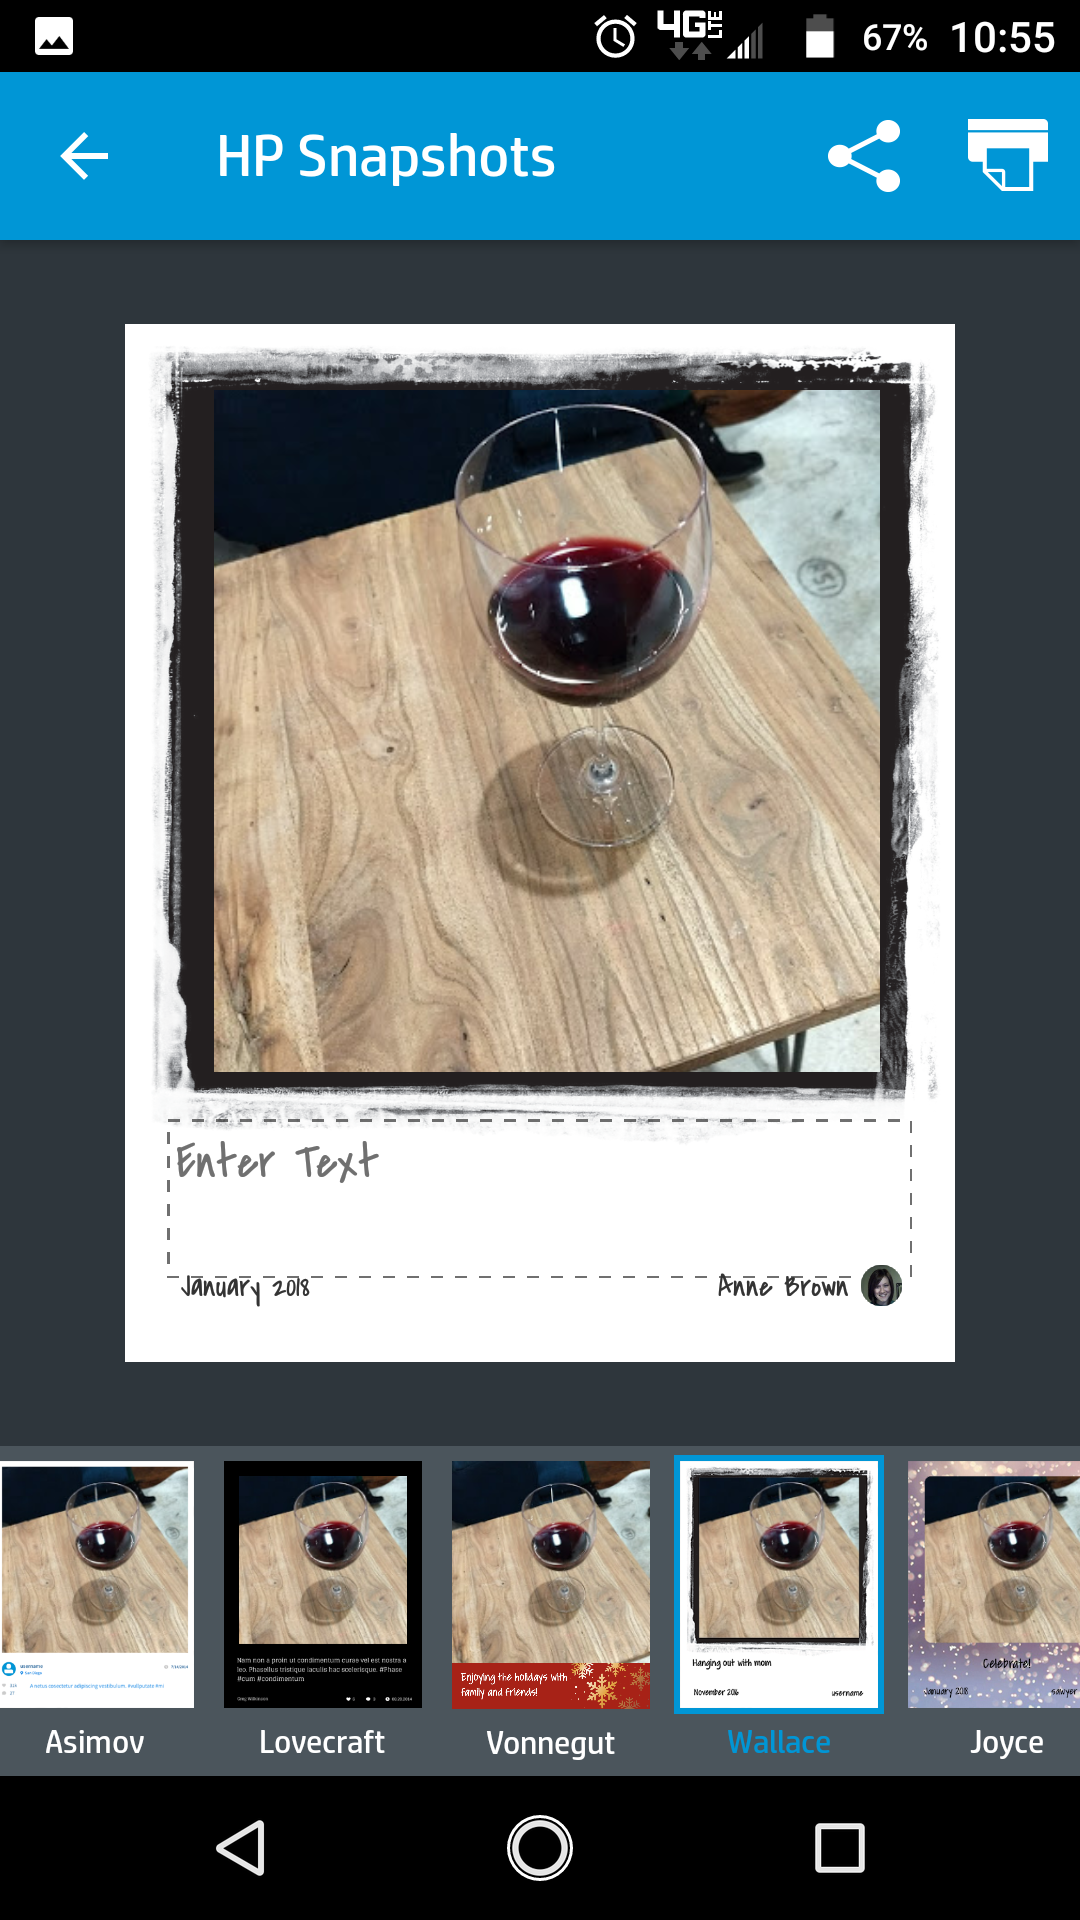
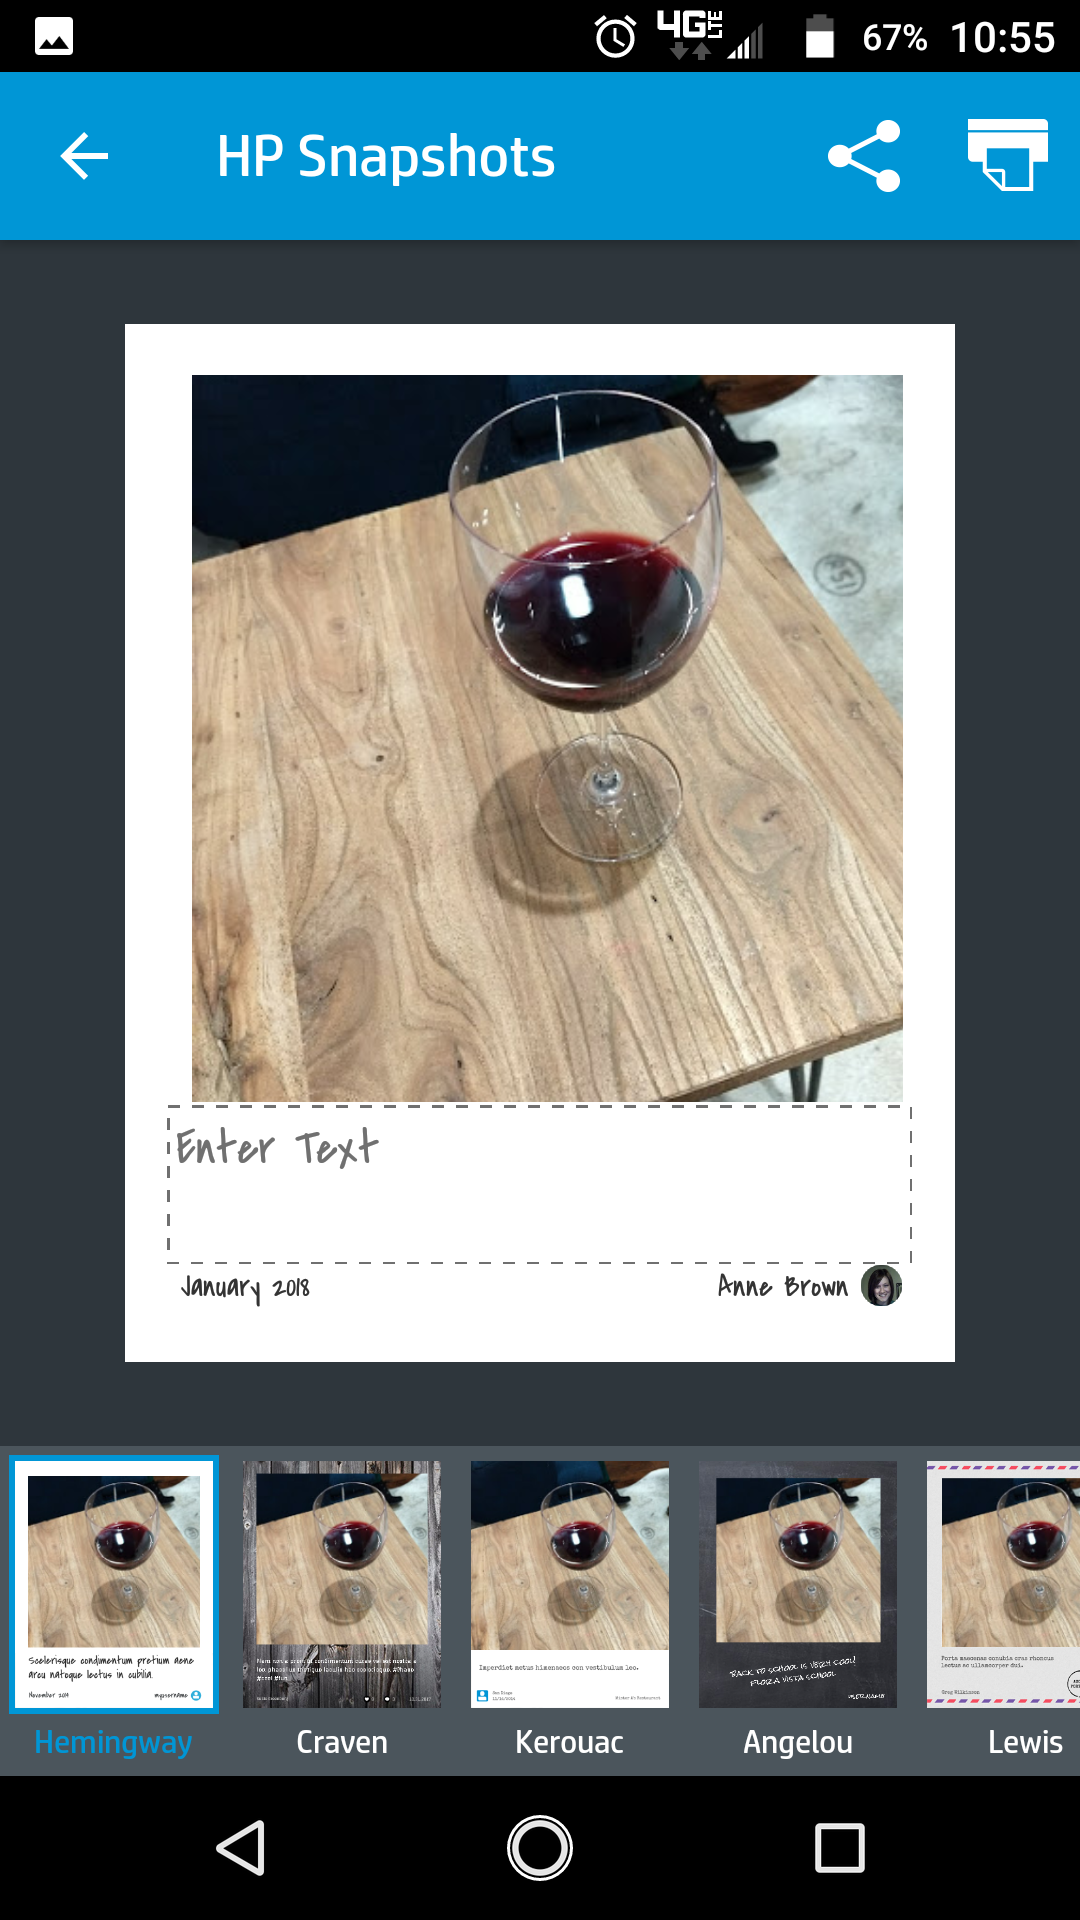
Next, you will choose your overlay ( see above photo). I always pick "clean". I like the way it gives me a blank slate and usually I won't add anything to it for a simple, clean look on my layouts. As you can see below, there are many more to chose from.
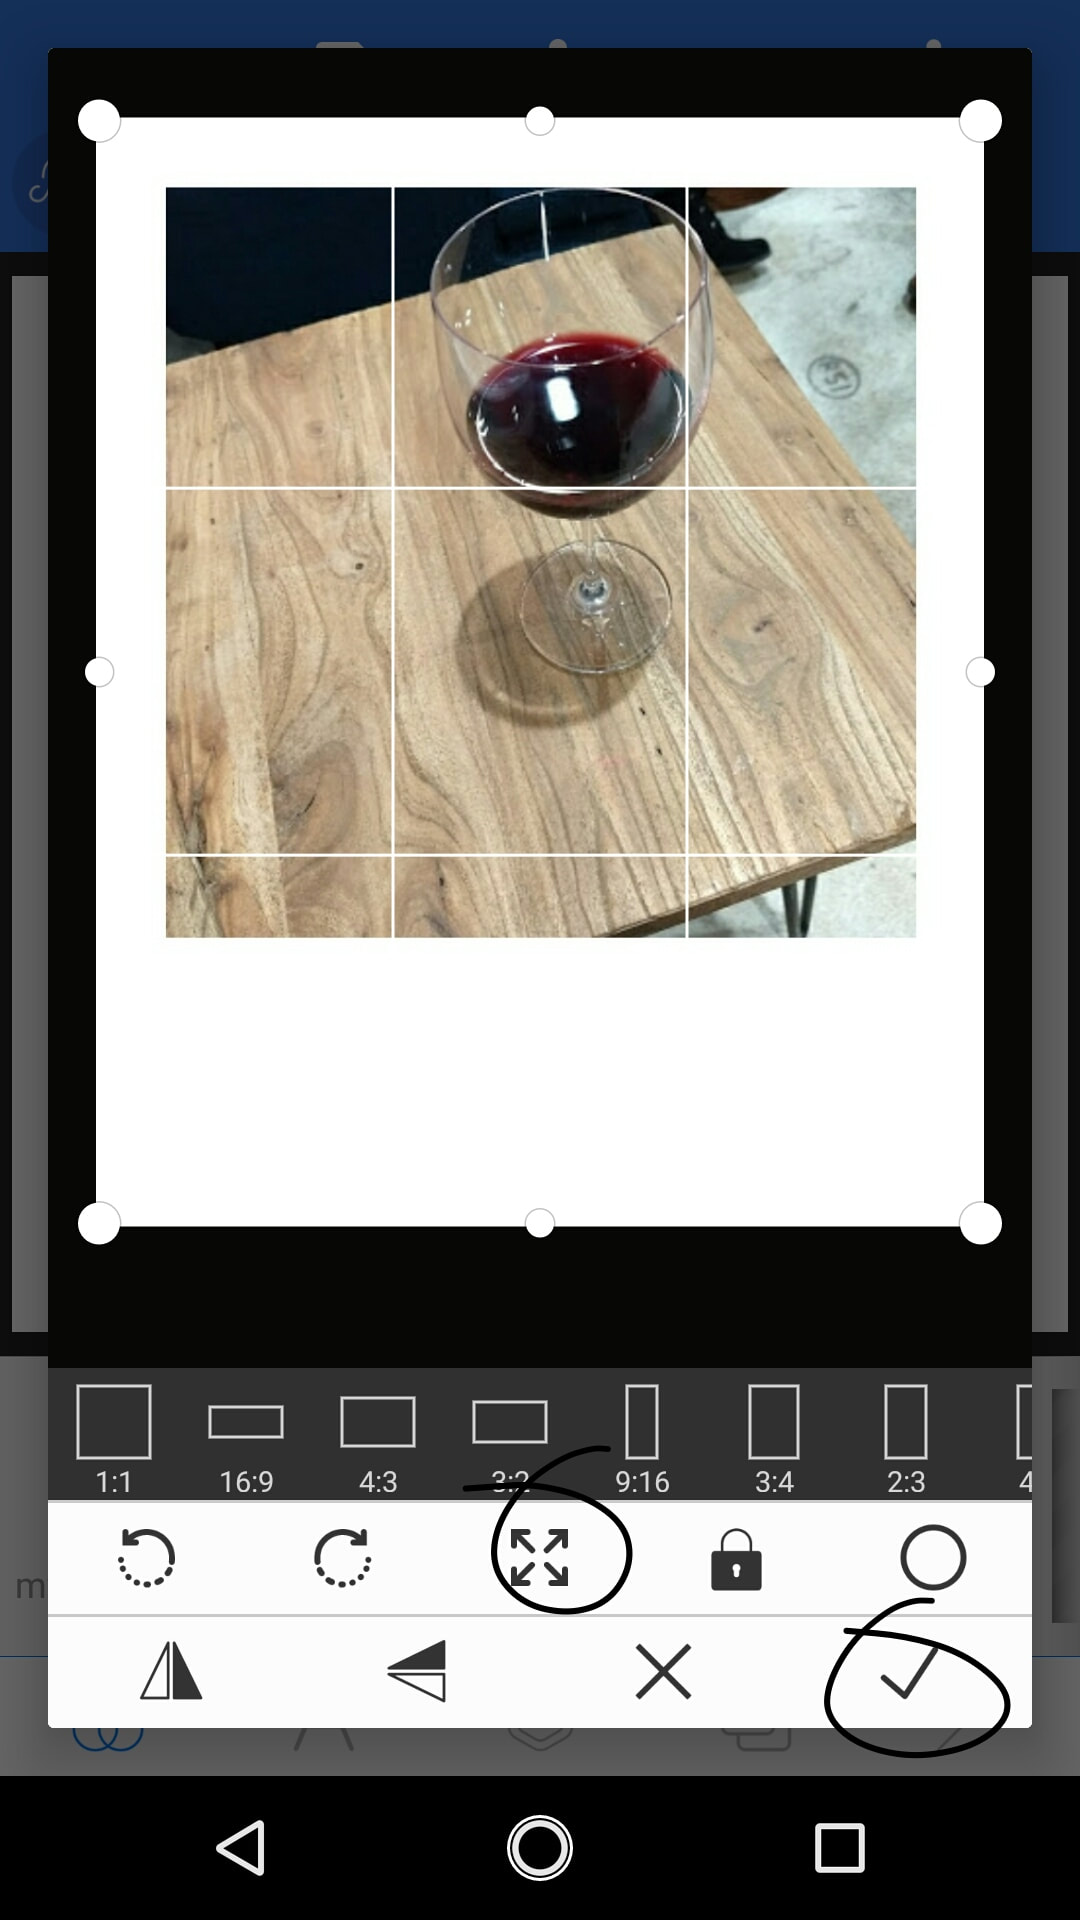
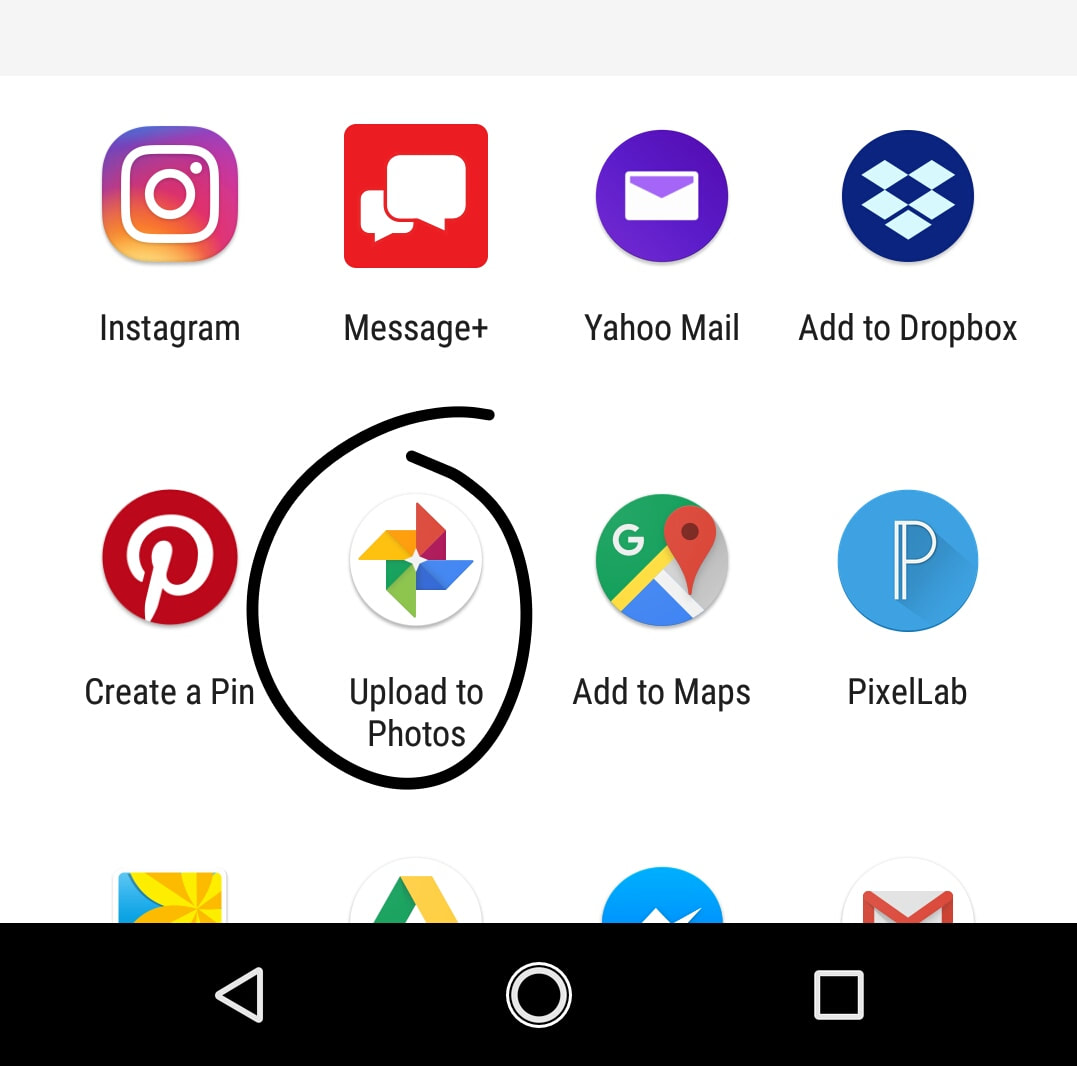
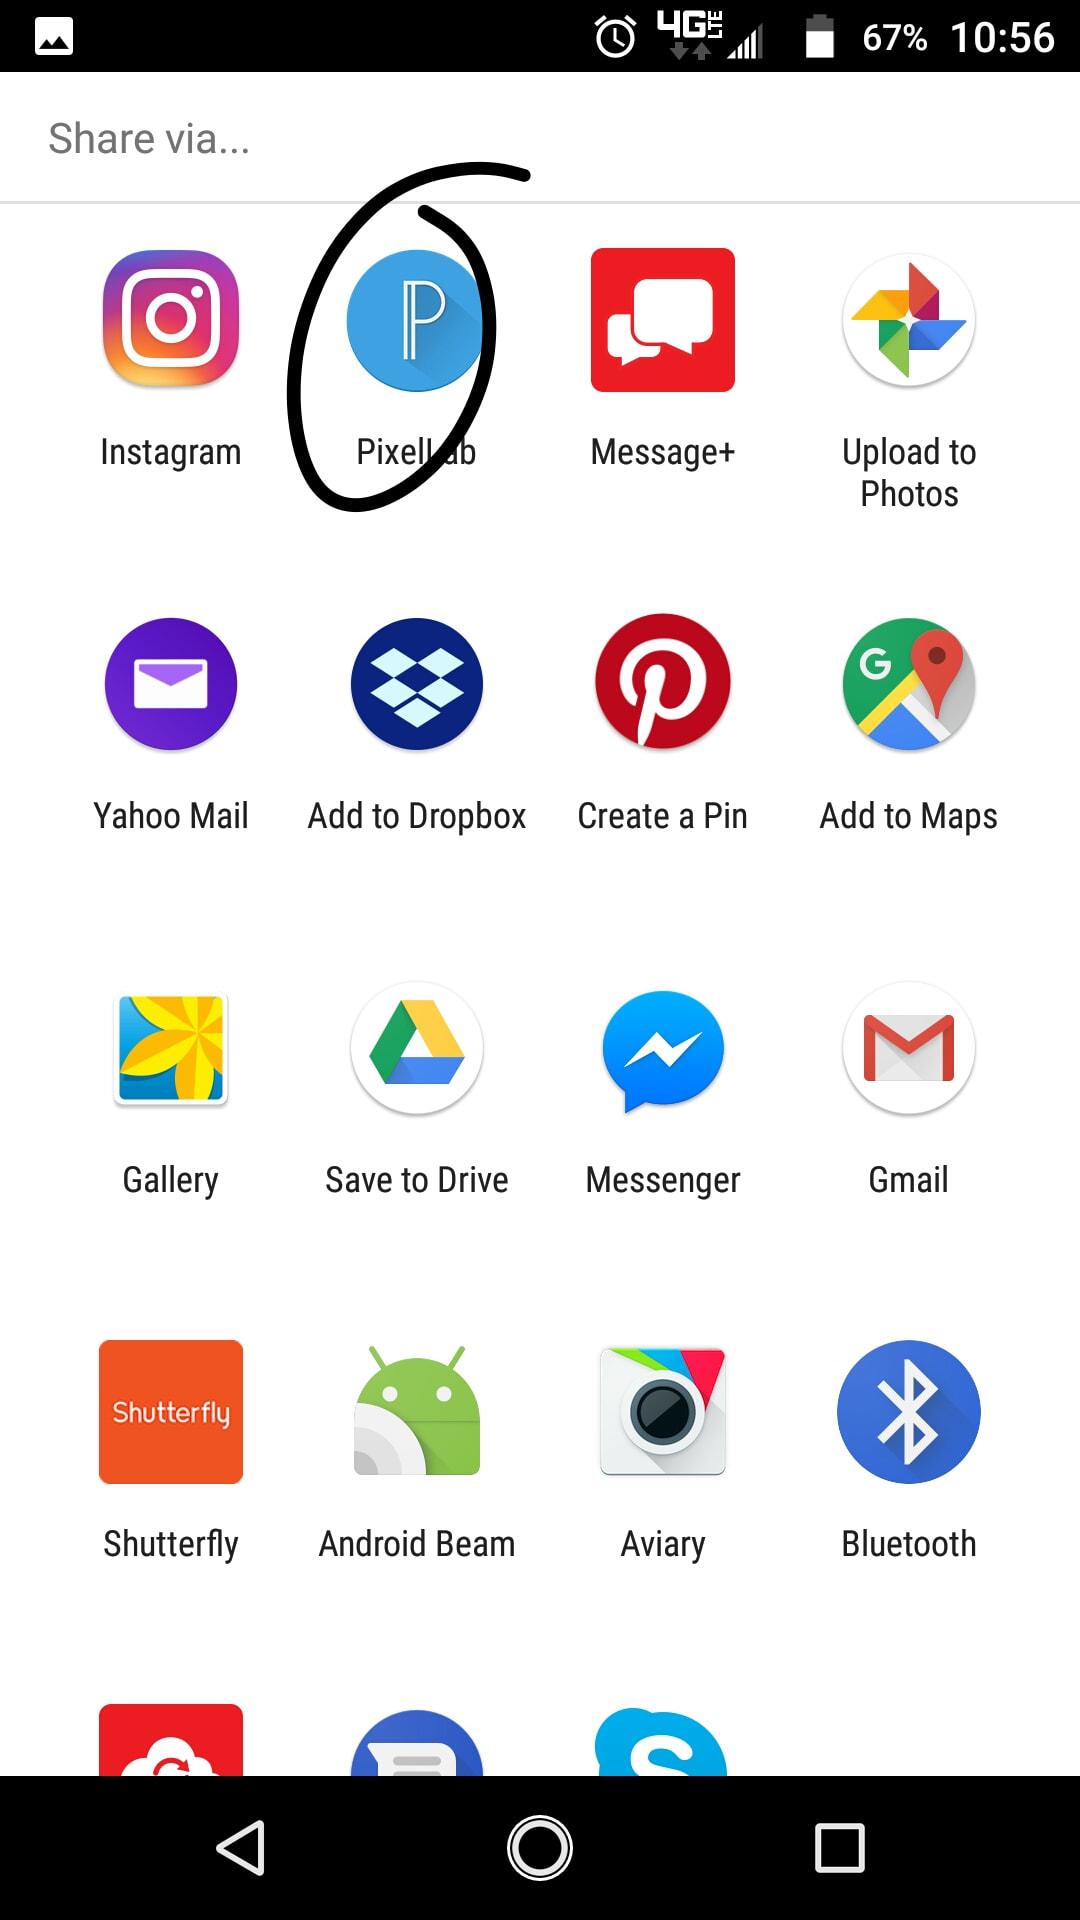
Once you've done that, you can do one of two things. After you hit the share button, you can save it to your photos. I upload to Google Photos. Or you can just share it directly to PixelLab. From there adjust it so, it is a full picture and hit the checkmark. Now you will be able to edit it.
 From here you can add text, change the brightness, saturation, etc. You can even add elements to it.
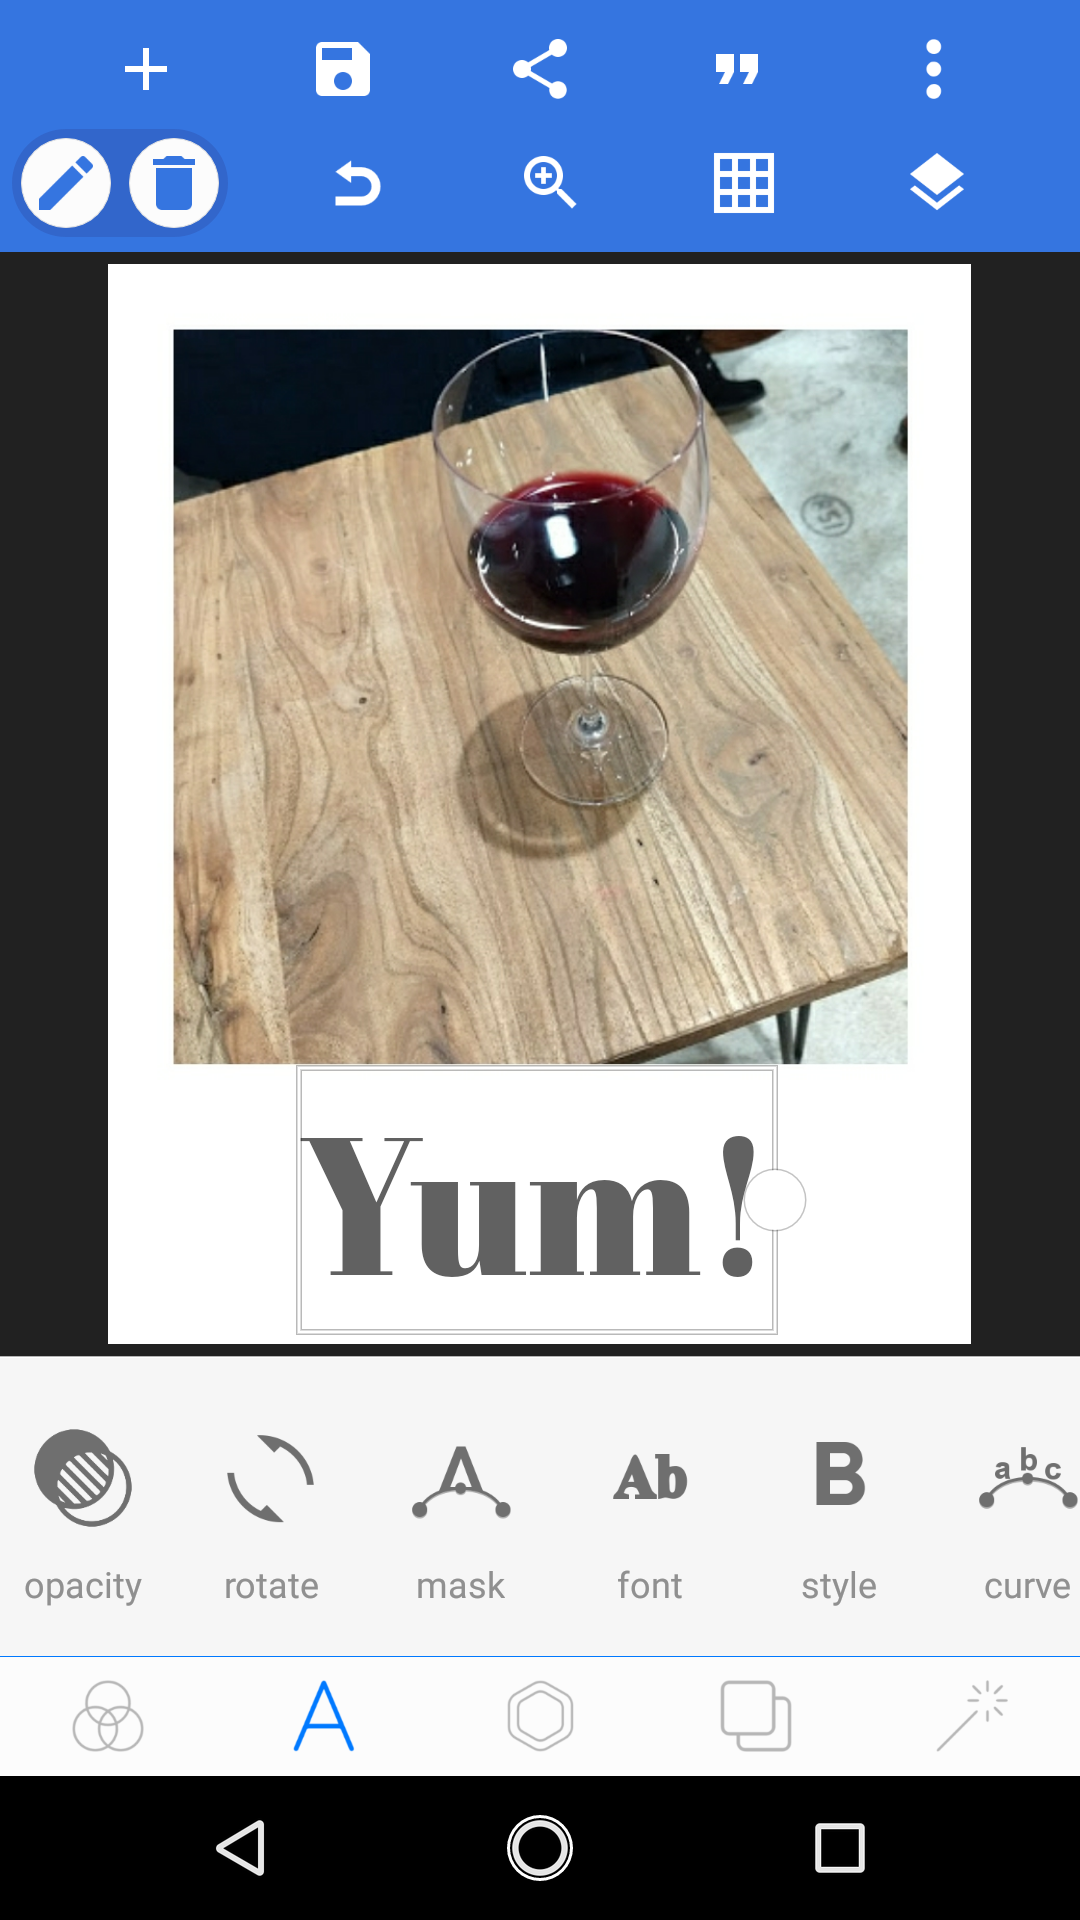
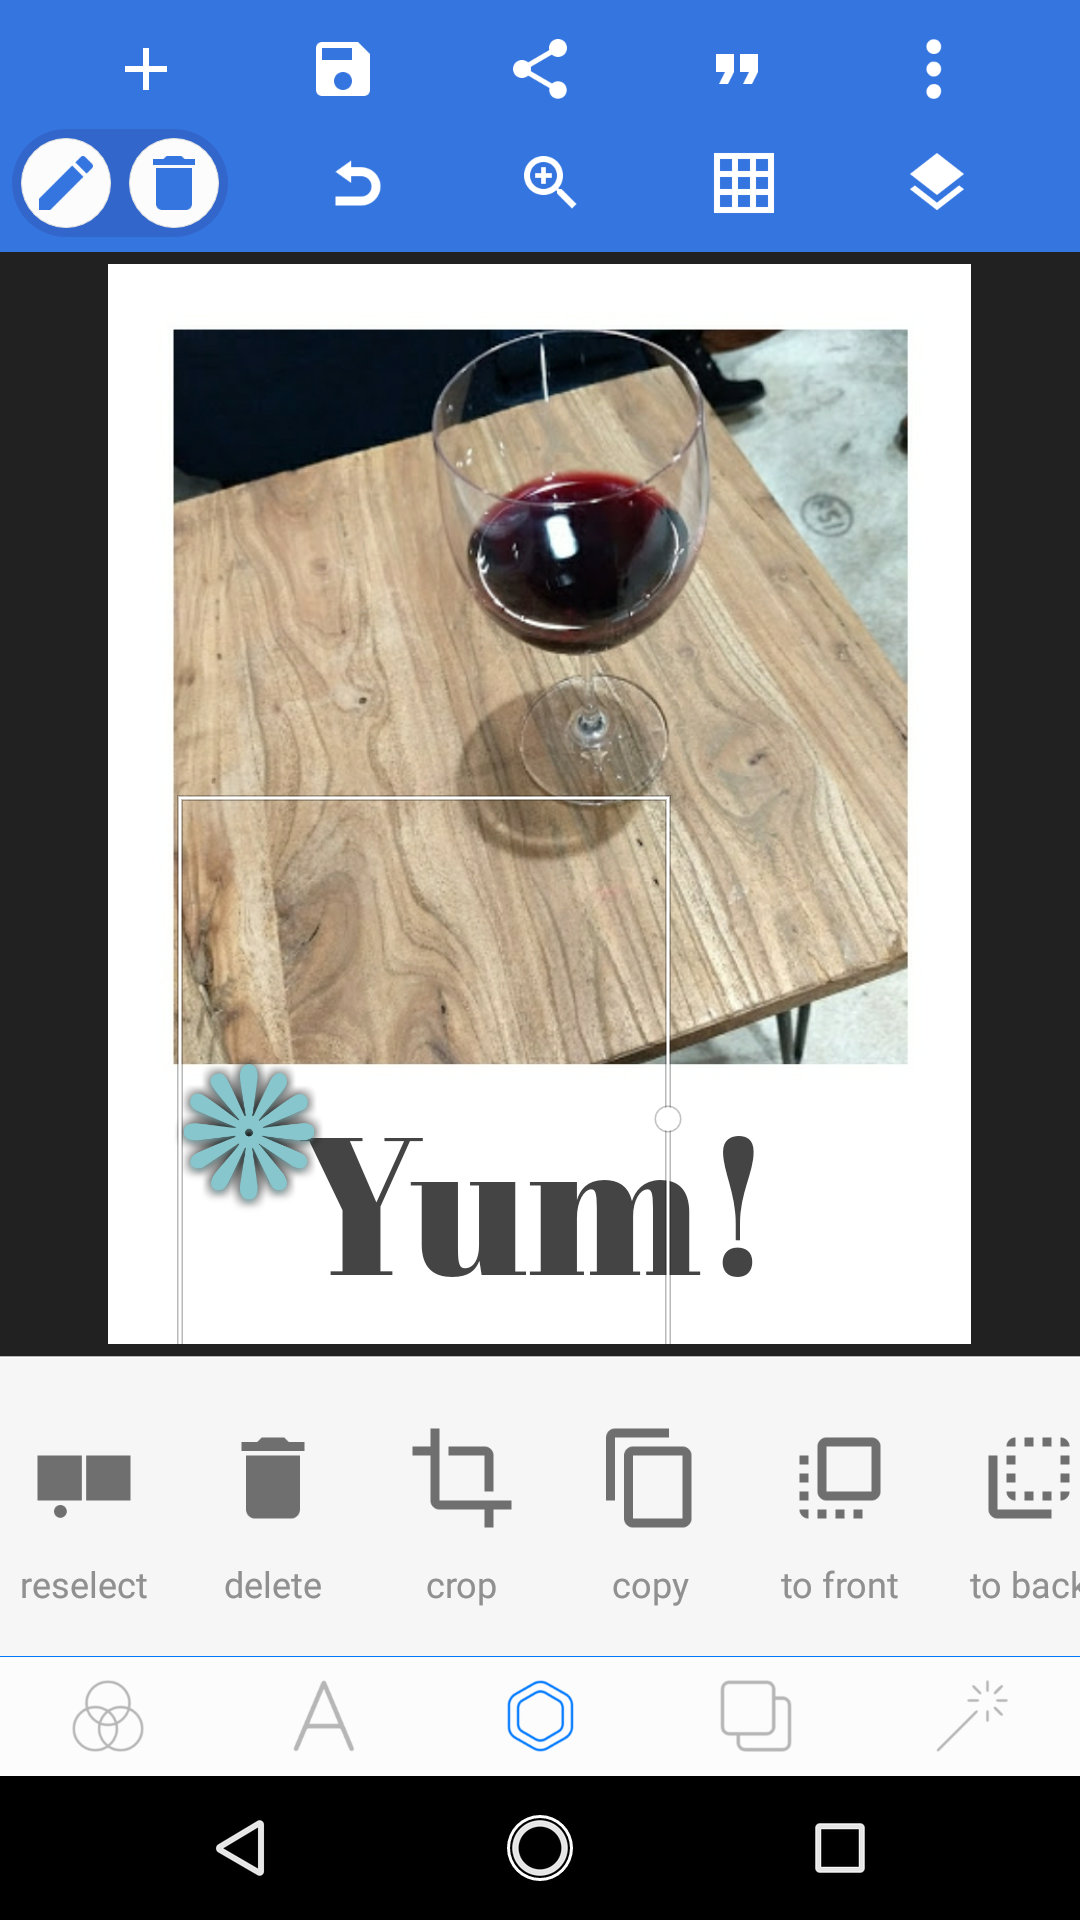
Last, save it from PixelLab to your gallery/photos storage and then add to your Project Life layout! 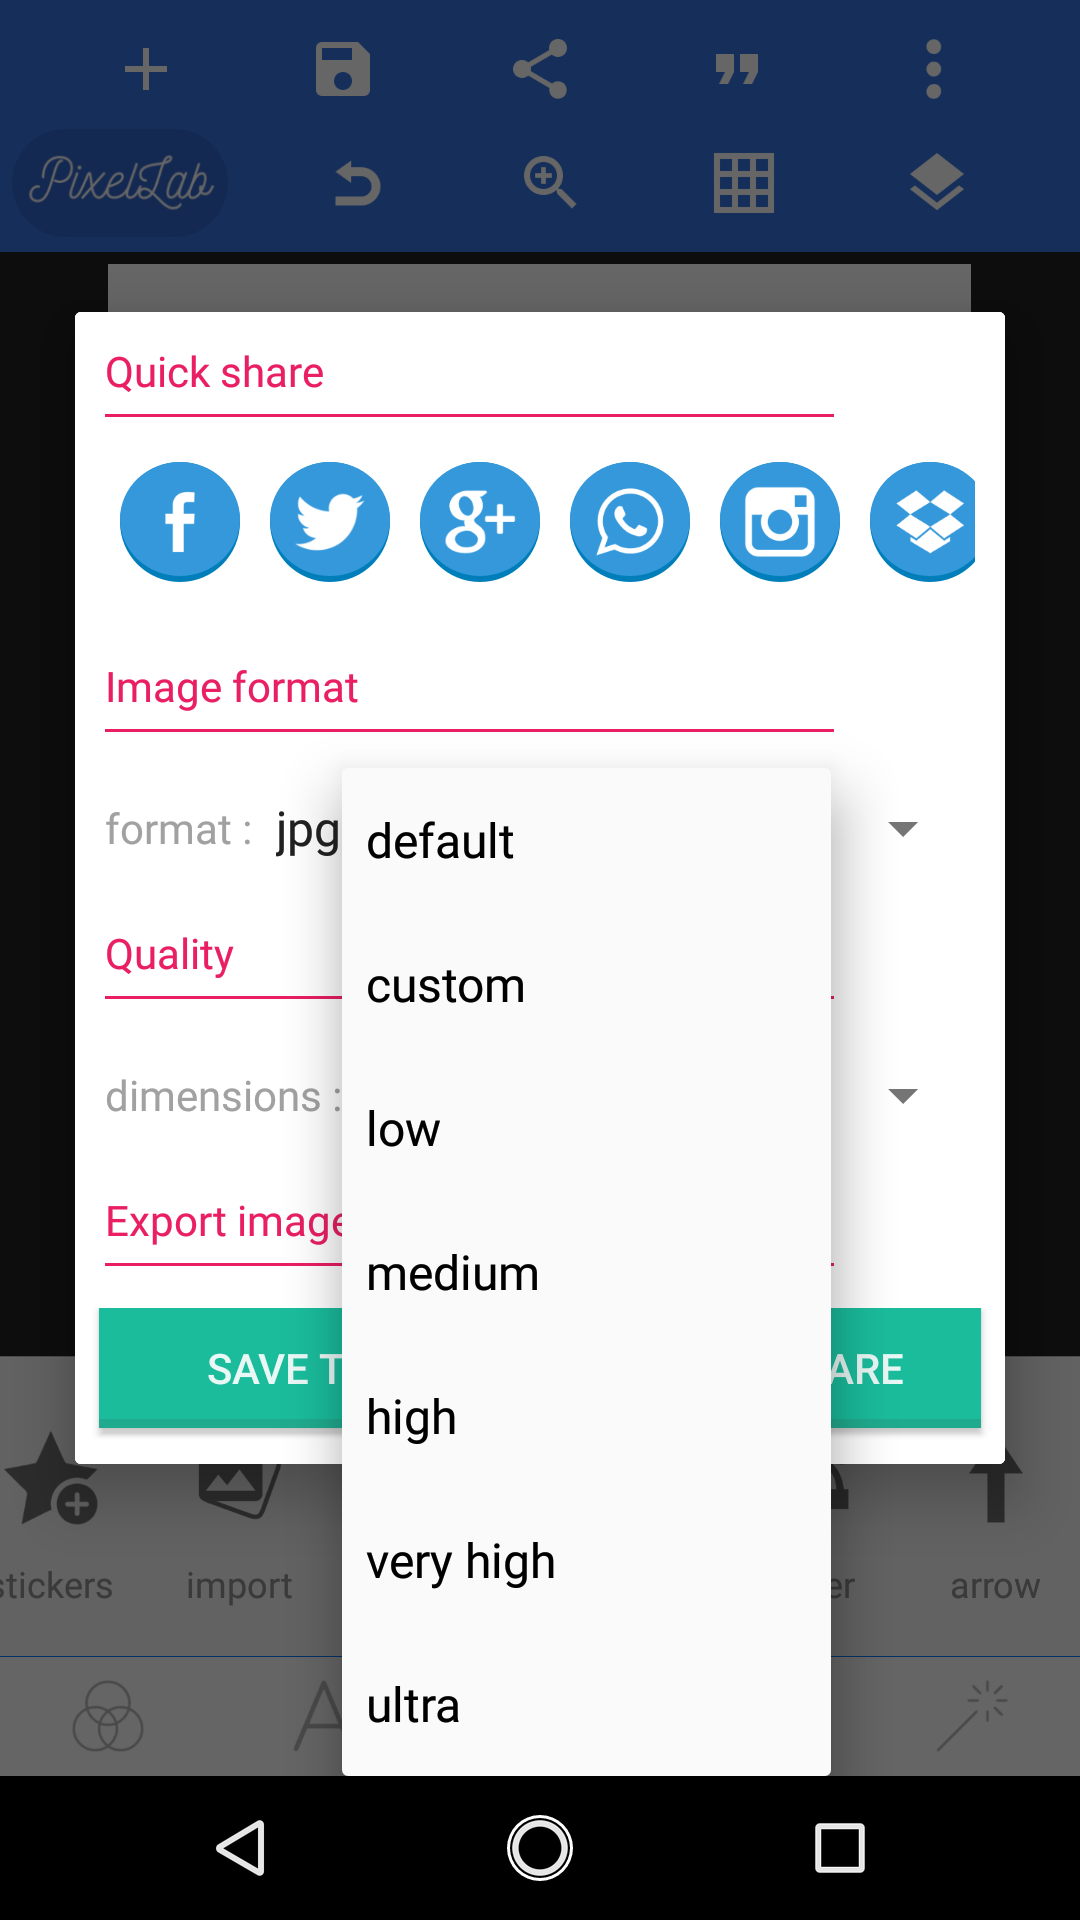 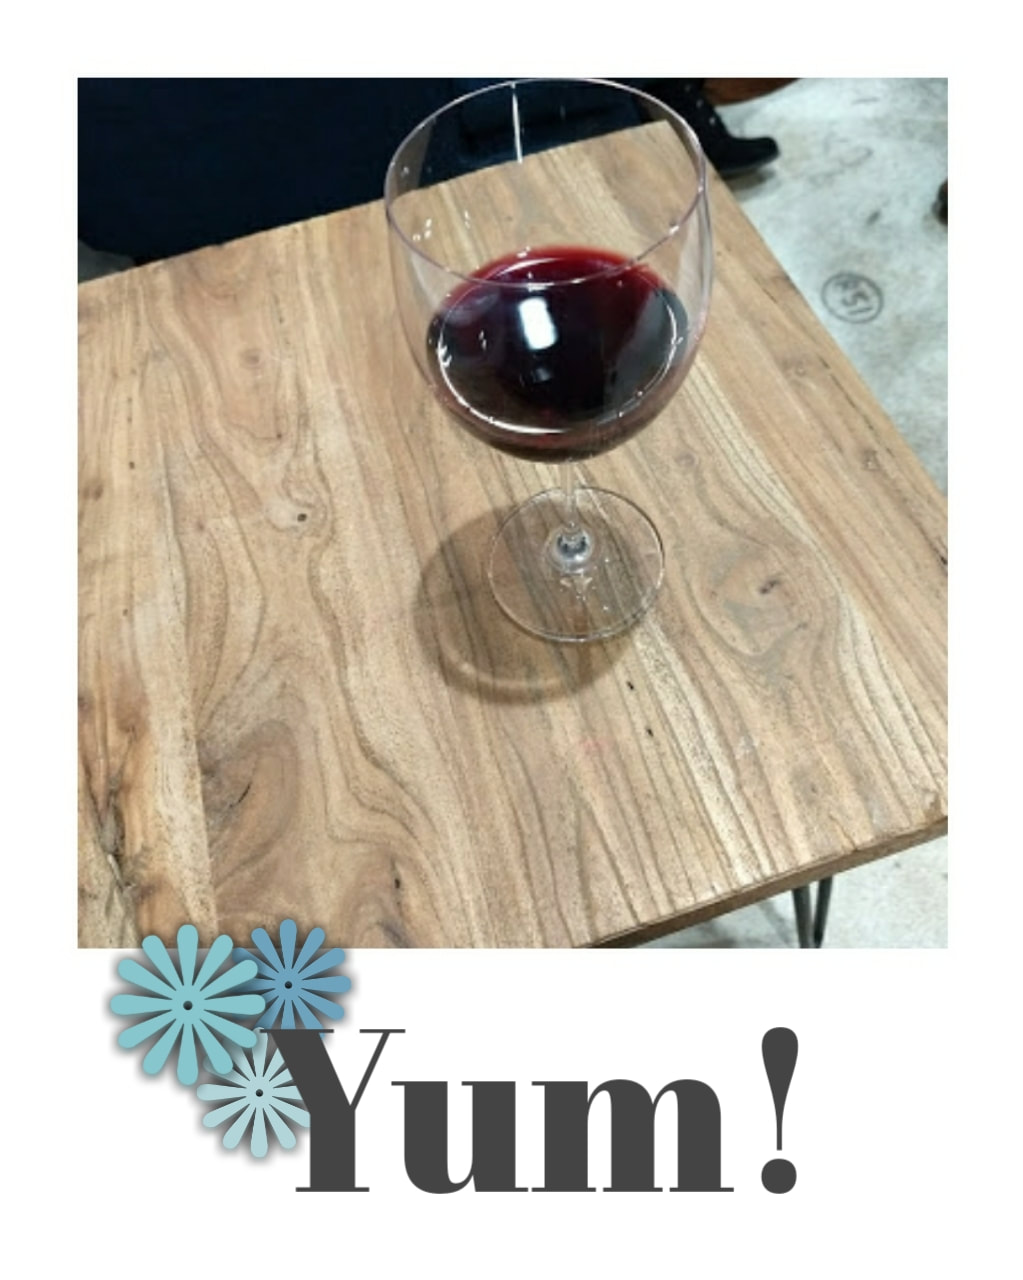 hello! I hope you all are having a good start to the year! We are doing well so far, it is just going by so quickly already! Today I'm kicking off the 1st part in my Pixelab 101 series. In this series, I hope to teach you the basics of this app, how to use it for your scrapping needs, and some other tips and tricks along the way. Through my journey with app scrapping, I of course, started with Project Life. But little did I know, there is a whole world of apps out there that you can use to scrapbook. Unfortunately, some of these apps are only available on iPhones. So, as an android user, I had to find something that would allow me to expand my creativity and abilities. Cue PixelLab! This app has been great for building pages, adding embellishments to my PL pages, and a lot of other things. So, today I want to start with the basics. I'm going to teach you the basic commands and simple things like adding text to a photo. 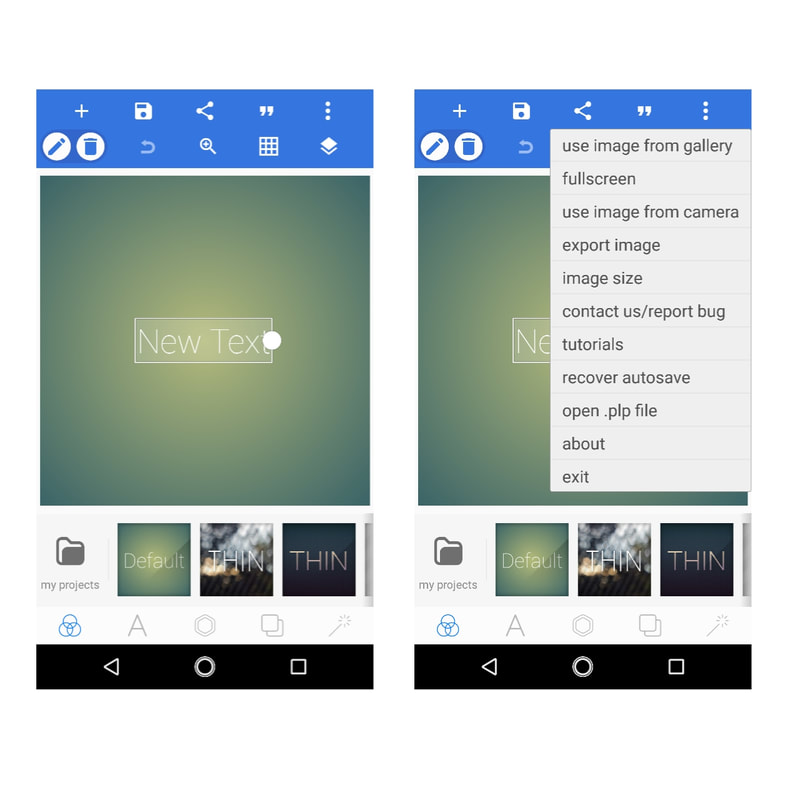 First, open up the app and click on the three dots in the upper right hand corner. This is where you will have a choice of commands. Select "use image from gallery"-this will be your background. Almost like the canvas if it were a painting.  Once you pick a photo, you will resize it, flip it, rotate it, whatever you need to do to work with. You will see this replace the green square. The text will stay, so to edit it, make sure you tap it (you will want the box around it, and then select the pencil down in the bottom left. 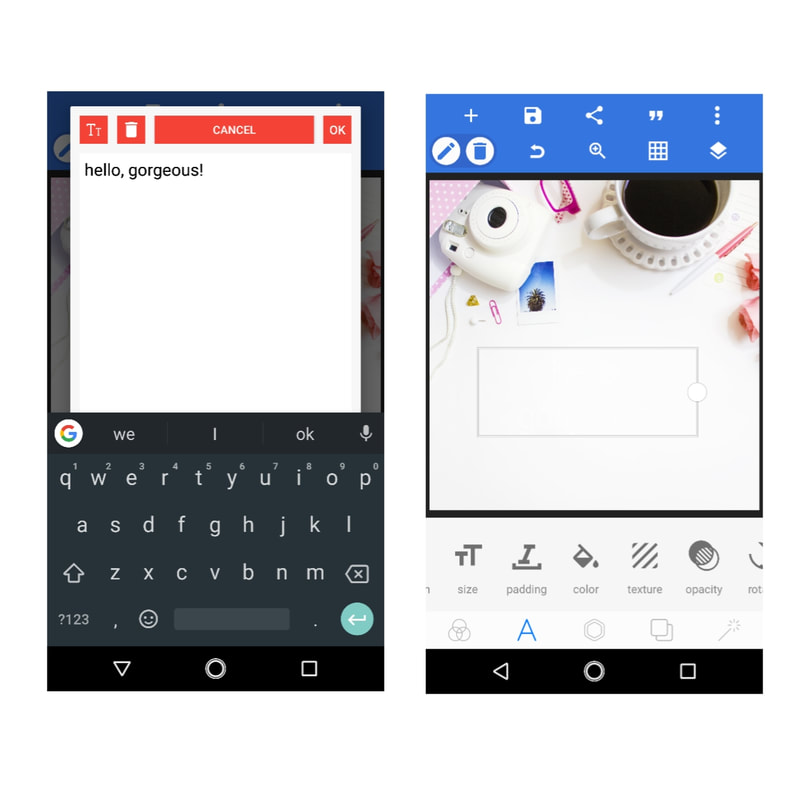 From there a text box will pop up and you can type whatever you want. I have learned that if I'm doing a large body of text, I will actually break it into a few sections. It's just easier to work with that way. To start editing your text, you can select any of the commands at the bottom of the screen. Just swipe left or right to see all of them. 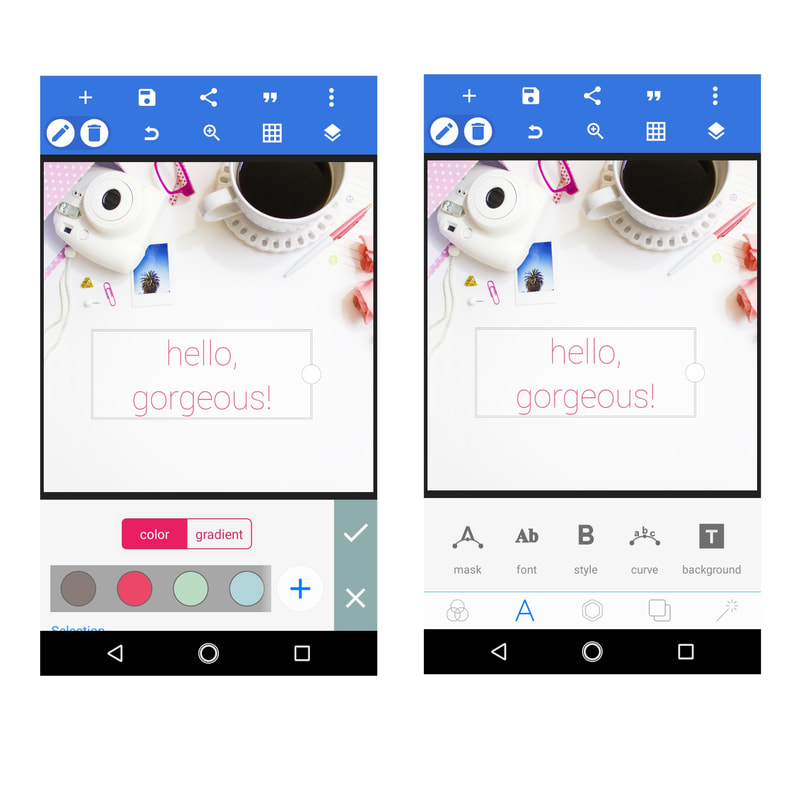 You can change the color, font, rotate, whatever. What I like about this app is all the choices. You can even select specific sections of the text and change it without changing all of it. 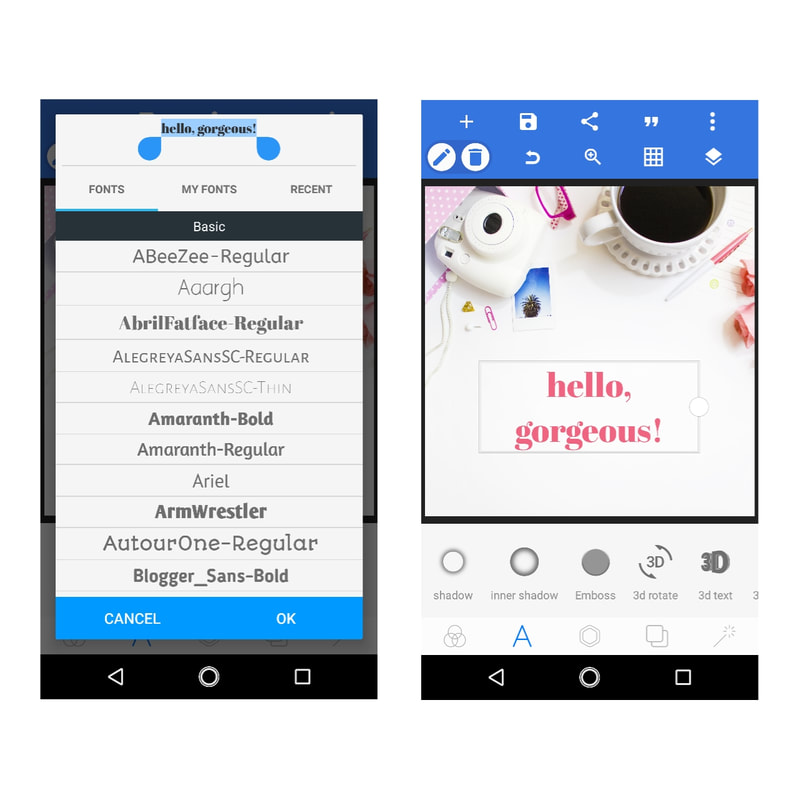 I chose AprilFatFace for this text. You can even upload your own text into the app. I cover that here. 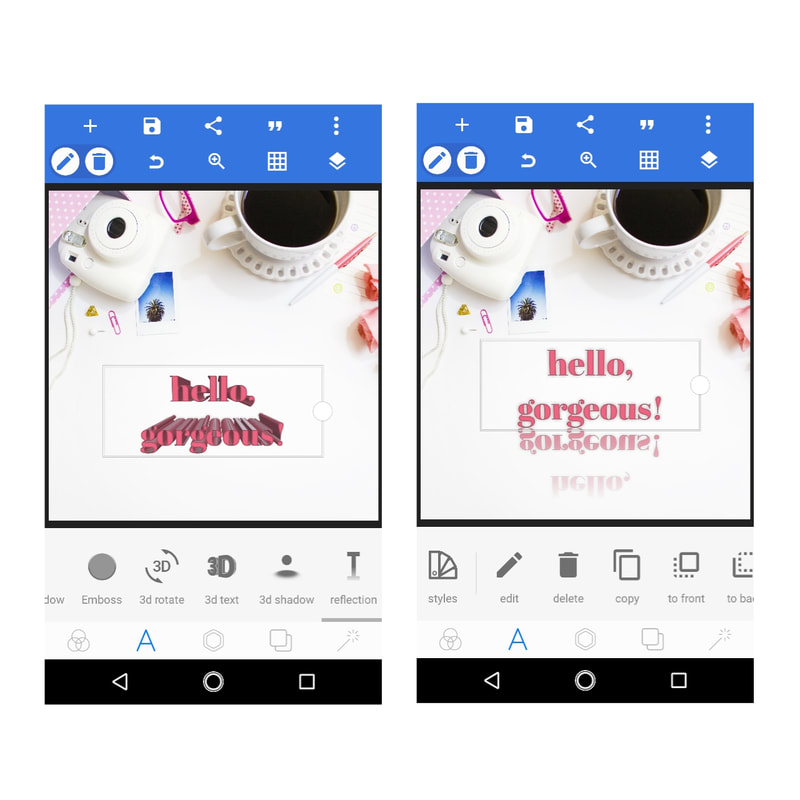 3D text and mirrored text.
Ok, that's our first lesson! Hope you enjoyed it and try out this app! What apps do you use to supplement your app scrapping? Peace, Anne hello! Well, folks, my train has gotten a little off track... I haven't been sharing my Project 52 pages (due to an unfortunate accident with my phone), and I haven't been updating you on my December Daily, and honestly, I just haven't had the time. With the holidays and the phone incident, (and I just got a tooth pulled! No fun!), I just fell behind. But I have so much to tell you! I am really looking forward to this next year. I had some goals I had set for 2017, and while some of those didn't pan out, I was able to keep up with my blog for the most part and learn even more about the Project Life app and digital scrapbooking. I have learned some new skills that I am hopefully going to be sharing with you this year, and I am even contemplating applying for another creative team. (In other news, I applied for the Becky Higgins creative team and did not make it :(, oh well, there's always next year!). I finished off 2017 with a strong sense of gratitude. I'll be honest with you, financially, this year was hard. We didn't have a lot to spend this Christmas. And with it being the first Christmas that L could really understand, we wanted to make it very special. Luckily, we have a wonderful family who pitched in and they really made the holiday special. So, I couldn't help but just look around and feel so grateful for the holiday, family, and the time I got to spend with L and M. So, on that note, I would like to share something with you! I have created some 3x4 cards I am giving away as freebies for your scrapbooking projects. They are focused on joy and gratitude, the two things I would like to carry into the next year. Click below to download and have a great year! 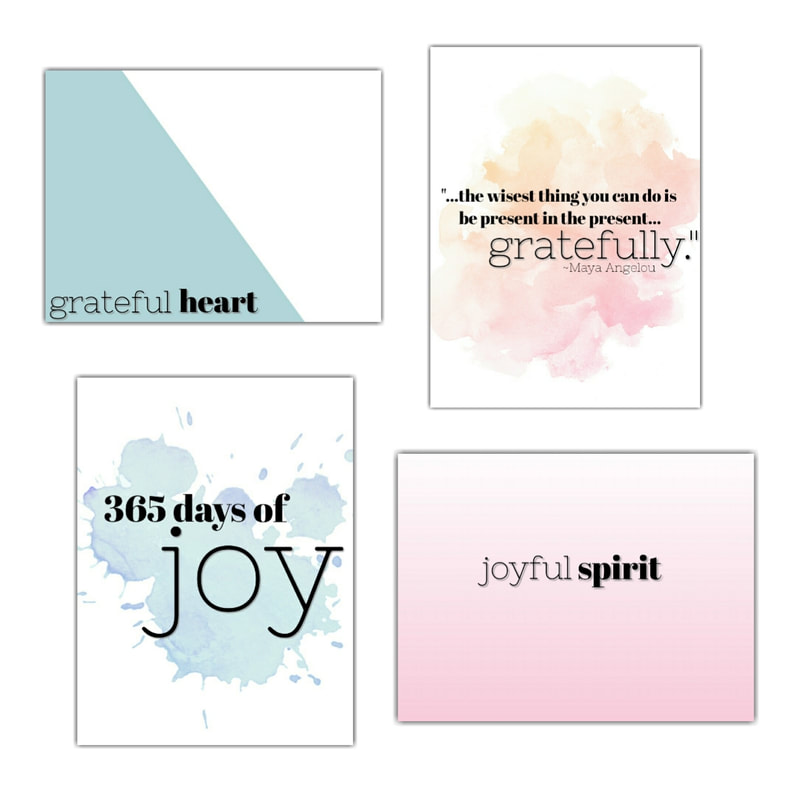 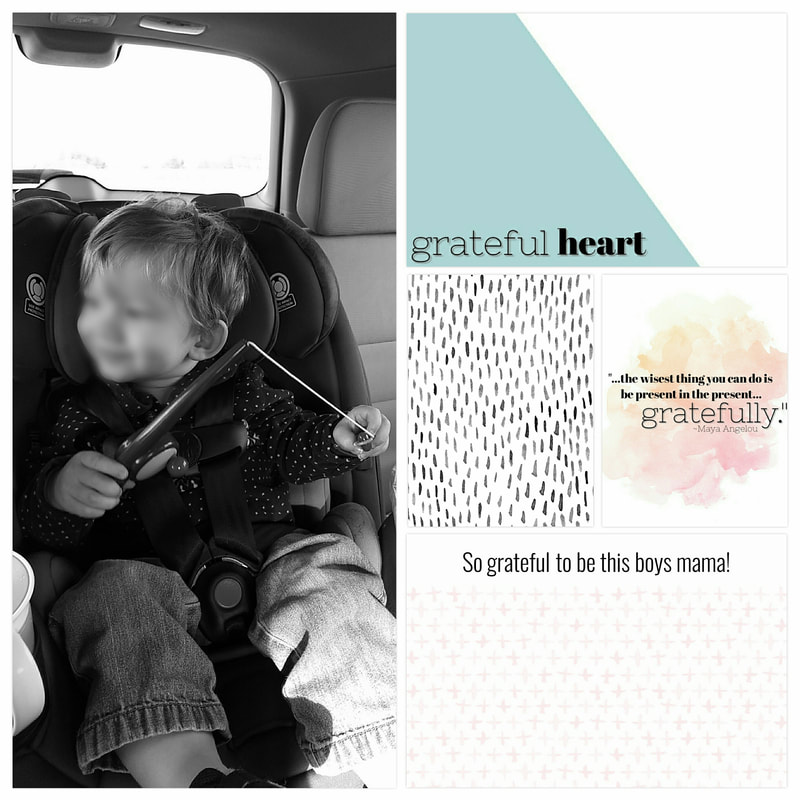 Peace,
Anne |
Hello!
I'm Anne! Follow me as I go through life as a new mom and soon-to-be wife. Always looking for a creative outlet, I want to share all my ideas with you here at Life by Design! 
Archives
February 2018
tags
All
|
 RSS Feed
